


Sydney Bueckert
Fitness Trainer
CES, FNS, GPTS, NASM-CPT
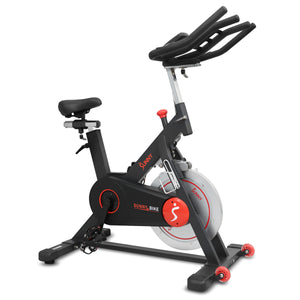
Indoor exercise bikes or stationary bike" are an awesome investment in your health! They make it easy and convenient to exercise when poor weather makes outdoor exercise difficult and are a great form of low impact cardiovascular activity. While exercise bikes have many perks, many new owners don’t realize regular maintenance is essential to keep a bike in tip-top shape through regular use. Keep reading to learn some of our top tips for daily, weekly, and monthly maintenance to keep your indoor exercise bike happy and healthy.
Daily Maintenance
We do recommend daily maintenance of your bike (or days when your bike is in use), while this may seem frequent once you’re in a regular routine this will take no longer than 5 minutes to complete after your ride. Think of it as a time to connect with your bike - keeping it healthy for the long haul!
1. Wipe Down Your Bike
The first thing you should do when you hop off your bike is to give it a nice wipe down. Sweat can be very corrosive and can cause long-term trouble if you find any parts on your bike ever need replacement down the road. Wipe down the seat, frame, and handlebars, giving extra attention to the seat post, handlebar post, and chain guard.
If using a solution to clean your bike, an antibacterial solution works best as the bike does have a coat of paint so it's not touching the metal itself. If doing daily, dry or damp cloth will do the trick!
2. Check for Vibrations
Hop on the bike and engage the drive train, paying attention to any vibrations felt through the pedals. If you do feel any vibrations, you may need to tighten the pedals, bottom bracket, or adjust the drivetrain tension. This is an important step that can help minimize further damages to your bike if parts do become loose.
3. Torque the Pedals
Finally, torque the pedals. Use the pedal wrench that came with your bike to tighten your pedals until they feel tight and secure.
Weekly Maintenance
Weekly maintenance requires tightening down hardware and inspecting various moving parts to make sure they’re all in good working order. In general, parts can loosen over time, and this weekly check-in can ensure all moving parts are tight, keeping you safe, and your bike healthy!
1. Tighten & Lubricate Pins
Inspect the pull pin frame fittings, making sure the fittings are snug. Loose frame fittings over time may strip out the thread and cause extensive damage to your bike. Next, clean and lubricate the pop pin assemblies by pulling on the pin and spraying a small amount of lubricant on the shaft.
2. Torque Seat Hardware
Torque the seat hardware, tightening any loose parts to make sure your seat is level, centered, and stable.
3. Clean & Lubricate Resistance Pads
This step is only for contact resistance bikes (felt or leather pads); if you have a magnetic bike, you won’t need this step, so skip to the next one. If you are one of our friends who have a bike with felt or leather resistance pads you will need to regularly lubricate them. Check out our guides for leather pad lubrication or felt pad lubrication.
4. Inspect Pedals & Bottom Bracket
Finally, visually inspect the bottom bracket of your bike, as well as the toe clips and straps on your bike. If any of these items are loose or disconnected, re-attach and tighten.
Monthly Maintenance
Monthly maintenance is a time for re-lubricating most moving parts and a basic hardware check.
1. Hardware Check
First, recheck all hardware such as water bottle holders, flywheel nuts, chain guard bolts, brake caliper lock nuts, and brake caliper tension rod nuts are secure. If they’re not, simply tighten!
2. Lubricate Chain Drive
This step is for chain drive bikes only, so if you have a belt drive bike you can skip this step. Lubricate the drive chain with any chain lubricant such as DuPont Teflon Chain Lubricant (we do not recommend using WD-40 or 3-n-1 lube for chain lubrication). This is accomplished by removing the outside chain cover and rotating the crank slowly while lubricating the drive chain. This will help to distribute the lubricant more effectively.
3. Lubricate Brake Tension Rod
Clean and lubricate the brake tension rod while inspecting for signs of wear such as missing threads.
4. Lubricate Posts
Clean and lubricate the seat post, handlebar post, and seat slider, removing any buildup of foreign material at the point of insertion.
To a new rider, bike maintenance can be a bit overwhelming, but once you get the hang of it, it’s quick and simple to do, especially if you’re doing it on a regular basis. While it may be tempting to skip regular maintenance of your bike, failing to upkeep with regular maintenance may lead to damages and expensive repairs down the road. I hope you enjoyed these regular maintenance tips, and they keep you in tune with your bike's needs!


Add Your Name & Email
Please enter your name and email to continue.We won’t display your email publicly.
6 comments
I had to Work on my bike but I love it, I have it running great. Model White B-81110